To give the input (Numbers) to Serial Monitor and get the output in OLED Display.
Required Components
- OLED Display -1 no
- Arduino UNO Board -1 no
- USB Cable -1 no
- Connecting wires -1 set
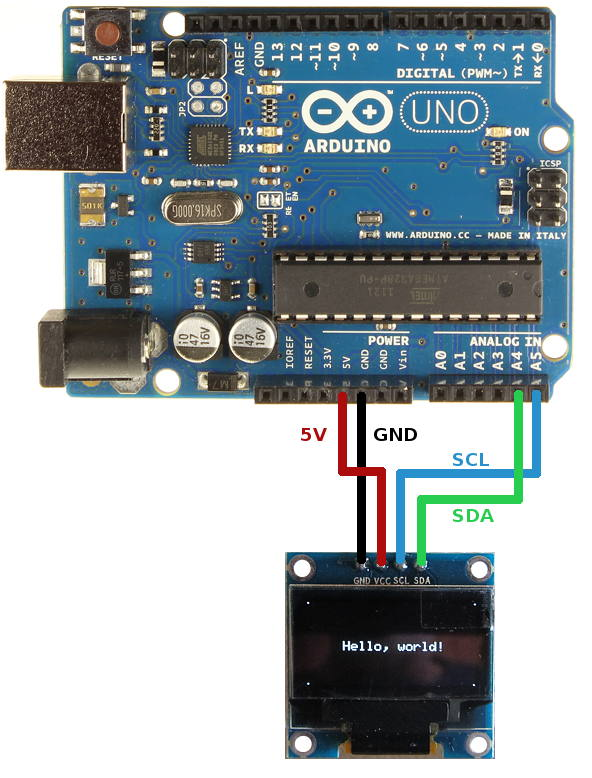
Circuit
Steps
- Make sure the components are working properly.
- Connect OLED Display gnd & VCC to the Arduino UNO Board gnd & 5V.
- Connect Arduino pin A4 & A5 to the OLED Display SDA & SCL.
- Check the Arduino program.
- Check the circuit connections.
- Run the Arduino program.
Arduino Program
#include <SPI.h>
#include <Wire.h>
#include <Adafruit_GFX.h>
#include <Adafruit_SSD1306.h>

Adafruit_SSD1306 display(-1);

void setup()
{
  Serial.begin(9600);
  display.begin(SSD1306_SWITCHCAPVCC, 0x3C);
}

void loop()
{
  if (Serial.available() > 0)
  {
    String a = Serial.readString();
    display.clearDisplay();
    display.setTextSize(2);
    display.setTextColor(WHITE);
    display.setCursor(10,10);
    display.println(a);
    display.display();
    delay(2000);
    Serial.print("Number received: ");
    Serial.println(a);
  }
}
Usage
- TVs
- Cellphone screens
- Computer screens
- Keyboards
- Lights
- Portable device displays