Creating Vibration Sensor program using Arduino UNO
Required Components
- Arduino Uno Board _1 no
- Vibration Sensor _1 no
- USB Cable _1 no
- Connecting Wires _1 set
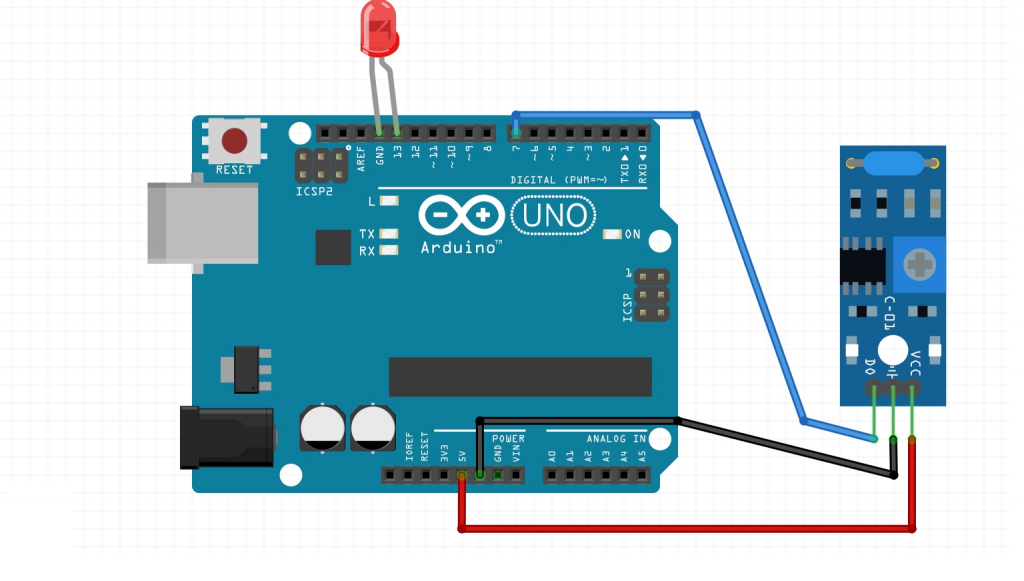
Circuit
Steps
- Make sure the components are working properly.
- Connect the Arduino UNO 7th pin to the Vibration Sensor DO pin.
- Connect the Arduino UNO 5V, GND to the Vibration Sensor VCC, GND.
- The LED 13th pin is Default.
- Connect the ground connection respectively.
- Check the Arduino program.
- Check the circuit connections.
- Run the Arduino program.
Arduino Program
int vib_pin=7;
int led_pin=13;

void setup()
{
  pinMode(vib_pin,INPUT);
  pinMode(led_pin,OUTPUT);
  Serial.begin(9600);
}

void loop()
{
  int val;
  long measurement =vibration();
  delay(50);
  Serial.println(measurement);
  if (measurement > 50){
    digitalWrite(led_pin, HIGH);
  }
  else{
    digitalWrite(led_pin, LOW);
  }
}

long vibration()
{
  long measurement=pulseIn (vib_pin, HIGH);
  return measurement;
}
Usage
- Food & Beverage
- Water & Waste water
- Oil & Gas
- Automotive