Python Tutorials – பாடம் 14 – 4×3 Matrix Keypad Module using Raspberry Pi Pico
Raspberry Pi Pico வை பயன்படுத்தி 4×3 Matrix Keypad Module ஐ கட்டுப்படுத்துவது
Required Components
4×3 Matrix Keypad-1 no
Raspberry Pi Pico board-1 no
Data Cable-1 no
Connecting Wires-8 no
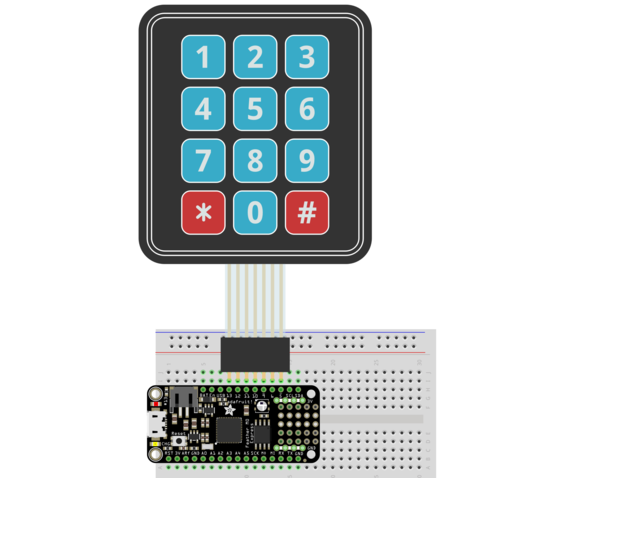
Circuit
Steps
நாம் பயன்படுத்தும் உபகரணங்கள் சரியாக வேலை செய்கிறதா என்பதை உறுதி செய்து கொள்ளவும்.
4×3 Matrix keypad 1 முதல் 7 வரை உள்ள பின்களை Raspberry Pi Pico GP1 முதல் GP7 வரை உள்ள பின்களுடன் இணைக்க வேண்டும்.
Python program ஐ சரி பார்க்க வேண்டும்.
மின்சுற்றை சரி பார்க்க வேண்டும்.
Python program ஐ ரன் செய்ய வேண்டும்.
Python Program
from machine import Pin
import utime

# define PINs according to cabling
# following array matches 1,2,3 PINs from 3x4 Keypad Matrix
col_list=[1,2,3]
# following array matches 4,5,6,7 PINs from 3x4 Keypad Matrix
row_list=[4,5,6,7]

# set row pins to output and change array elements from
#    int to Pin objects, all set to high
for x in range(0,4):
    row_list[x]=Pin(row_list[x], Pin.OUT)
    row_list[x].value(1)

# set columns pins to input and change array elements
#   from int to Pin objects. We'll read user input here
for x in range(0,3):
    col_list[x] = Pin(col_list[x], Pin.IN, Pin.PULL_UP)

# Create a map between keypad buttons and chars
key_map=[["#","0","*"],\
         ["9","8","7"],\
         ["6","5","4"],\
         ["3","2","1"]]

def Keypad3x4Read(cols,rows):
  for r in rows:
    r.value(0)
    result=[cols[0].value(),cols[1].value(),cols[2].value()]
    if min(result)==0:
      key=key_map[int(rows.index(r))][int(result.index(0))]
      r.value(1) # manages key keept pressed
      return(key)
    r.value(1)

# Start the main loop
print("--- Ready to get user inputs ---")
while True:
    key=Keypad3x4Read(col_list, row_list)
    if key != None:
      print("You pressed: "+key)
      utime.sleep(0.3) # gives user enoght time to release without having double inputs