Creating IR Sensor program using Arduino UNO
Required Components
- Infrared sensor-1
- Arduino board -1
- Connecting cables -1 set
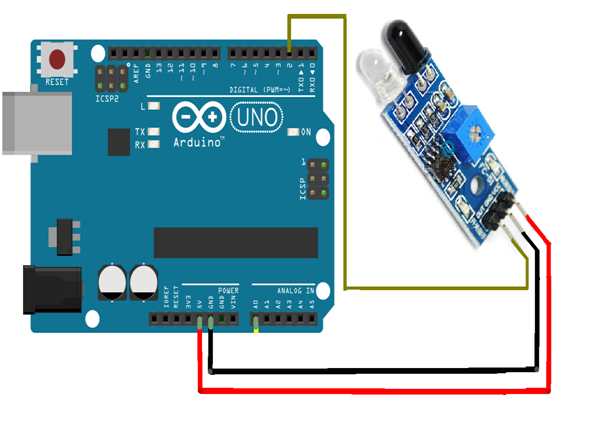
Circuit
Steps
- Make sure the components are working properly.
- Connect the IR Sensor to the Arduino UNO board.
- Connect the Arduino UNO board 2nd pin to the IR Sensor.
- Connect IR Sensor board VCC, GND to 5V, GND of Arduino Uno Board.
- Check the Cicuit Connections.
- Check the Arduino program.
- Run the Arduino program.
Arduino Program
int IRPin = 2;
int ledPin=13;
int value;

void setup(  )
{
  pinMode (ledPin,OUTPUT);
  pinMode(IRPin, INPUT);
  Serial.begin(9600);
}
void loop(  )
{
  if (digitalRead (IRPin)==HIGH)
  {
    digitalWrite(ledPin,HIGH);
    Serial.print("Sensor is detect,LED is on");
    delay(100);
  }
  else
  {
    digitalWrite(ledPin,LOW);
    Serial.print("signal is cut,LED is off");
    delay(100);
  }
  value = digitalRead(IRPin);
  Serial.println(value);
}
Usage
- Flame Monitors
- Radiation Thermometers
- Moisture Analyzer
- Gas Analyzers
- IR Imaging Devices