Raspberry Pi Pico வை பயன்படுத்தி ஒரு position encoder ஐ அளவீடு செய்வது.
Required Components
- Position encoder sensor-1 no
- Raspberry Pi Pico-1 no
- Connecting Wires-1 set
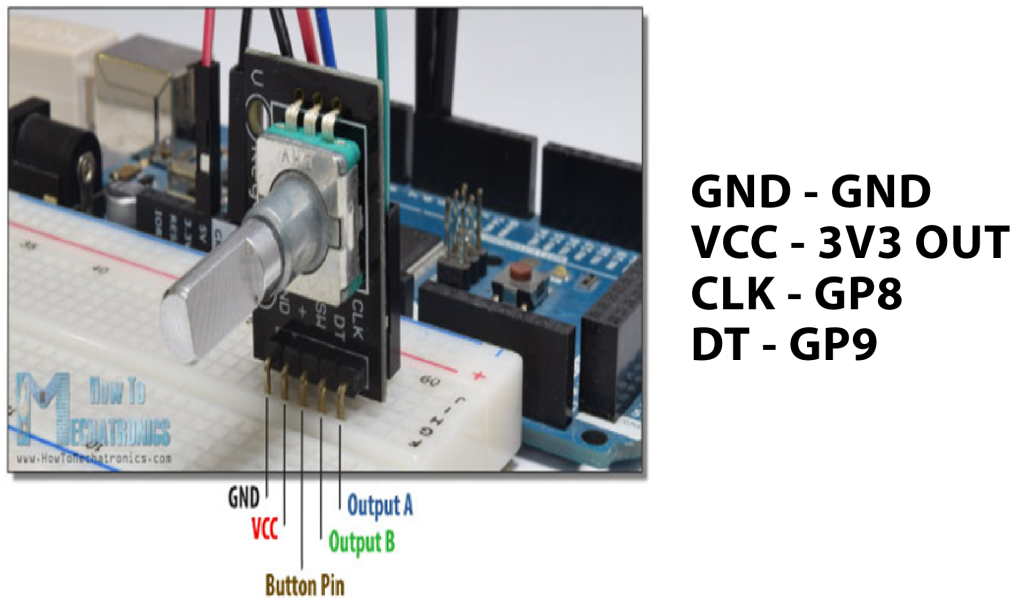
Circuit
Steps
- நாம் பயன்படுத்தும் உபகரணங்கள் சரியாக வேலை செய்கிறதா என்பதை உறுதி செய்து கொள்ளவும்.
- Position encoder sensorல் உள்ள CLK மற்றும் DT பின்களை Raspberry Pi Pico வில் உள்ள GP8 மற்றும் GP9 பின்களுடன் இணைக்க வேண்டும்.
- Position encoder ன் +5V மற்றும் ground சப்ளையை Raspberry Pi Pico 3V3 (OUT) மற்றும் gnd உடன் இணைக்க வேண்டும்.
- Arduino program ஐ சரி பார்க்க வேண்டும்.
- மின்சுற்றை சரி பார்க்க வேண்டும்.
- Arduino program ஐ ரன் செய்ய வேண்டும்.
Arduino Program
#define outputA 8
#define outputB 9
int counter = 0;
int aState;
int aLastState;

void setup()
{
  pinMode (outputA,INPUT);
  pinMode (outputB,INPUT);
  Serial.begin (9600);
  aLastState = digitalRead(outputA);
}

void loop()
{
  aState = digitalRead(outputA); // Reads the "current" state of the outputA
  if (aState != aLastState)
  {
    if (digitalRead(outputB) != aState)
    {
      counter ++;
    } else {
      counter --;
    }
    Serial.print("Position: ");
    Serial.println(counter);
  }
  aLastState = aState;
}
