Raspberry Pi Pico வை பயன்படுத்தி Servo மோட்டாரை சுற்ற வைப்பது
Required Components
- Servo motor(5V)-1 no
- Raspberry Pi Pico board-1 no
- Connecting wires-1 set
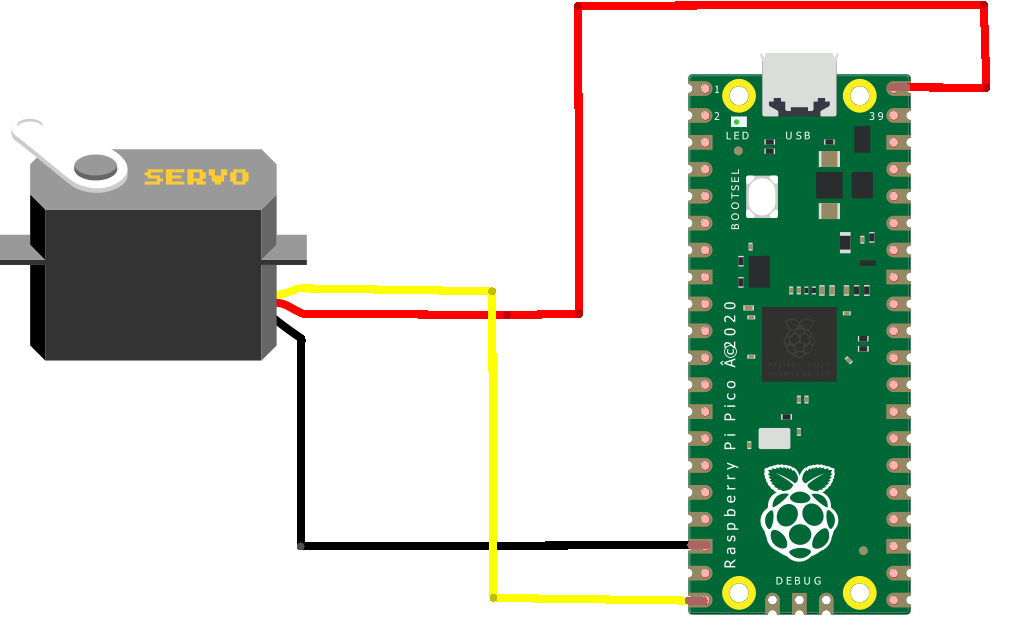
Circuit
Steps
- நாம் பயன்படுத்தும் உபகரணங்கள் சரியாக வேலை செய்கிறதா என்பதை உறுதி செய்து கொள்ளவும்.
- Servo மோட்டாருக்கு மூன்று இணைப்புகள் உள்ளன, அதில் ஒன்று data pin, +5v மற்றும் ground.
- Raspberry Pi Pico GP15 ஆவது இணைப்பை நேரடியாக மோட்டார் உடன் இணைக்க வேண்டும்.
- Servo வில் உள்ள +5v மற்றும் ground ஐ Raspberry Pi Pico VBus மற்றும் gnd உடன் இணைக்க வேண்டும்.
- Arduino program ஐ சரி பார்க்க வேண்டும்.
- மின்சுற்றை சரி பார்க்க வேண்டும்.
- Arduino program ஐ ரன் செய்ய வேண்டும்.
Arduino Program
#include<Servo.h>
Servo servo1;

void setup(  )
{
  servo1.attach(15);
}

void loop(  )
{
  servo1.write(0);
  delay(1000);
  servo1.write(90);
  delay(1000);
  servo1.write(180);
  delay(1000);
}
