Creating A Solenoid Valve program using Arduino UNO
Required Components
- Solenoid valve -1 no
- Darlington Transistor -1 no
- Resistor(10K) -1 no
- IN4001 Diode -1 no
- Arduino UNO -1 no
- Bread board -1 no
- Connecting wires -1 set
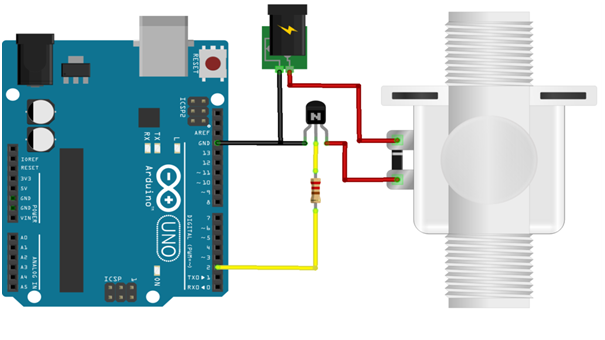
Circuit
Steps
- Make sure the components are working properly.
- Connect the Transistor to the Arduino UNO board & Solenoid valve.
- Connect the 10K resistor to the Transistor.
- Connect the Power supply to the Solenoid valve.
- Connect the Solenoid valve to the Arduino UNO board.
- Connect the 10K resistor to the 2nd pin of Arduino UNO board.
- Check the Cicuit Connections.
- Check the Arduino program.
- Run the Arduino program.
Arduino Program
int solenoidPin = 9;

void setup( )
{
  pinMode(solenoidPin, OUTPUT);
}

void loop( )
{
  digitalWrite(solenoidPin, HIGH);
  delay(1000);
  digitalWrite(solenoidPin, LOW);
  delay(1000);
}
Usage
- Computer printers
- Fuel injection gear
- Vehicles like cars
- Industrial setting