Creating Soil Moisture Sensor program using Arduino UNO
Required Components
- Soil sensor -1 no
- Arduino UNO -1 no
- Connecting Wires -1 set
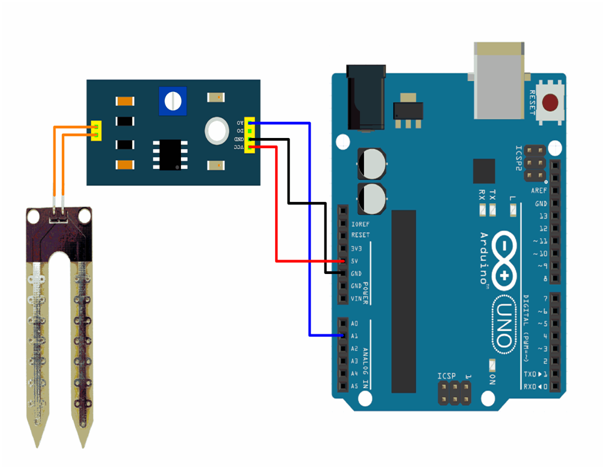
Circuit
Steps
- Make sure the components are working properly.
- Connect the Soil moisture to the Arduino UNO board.
- Connect the Arduino UNO board A0 pin to the Soil moisture(Analog or Digital).
- Connect the interfacing to the Arduino UNO board.
- Connect Humidity Sensor board VCC, GND to 5V, GND of Arduino Uno Board.
- Check the Cicuit Connections.
- Check the Arduino program.
- Run the Arduino program.
Arduino Program
int sensorPin = A0;
int sensorValue;
int limit = 300;

void setup( )
{
  Serial.begin(9600);
  pinMode(13, OUTPUT);
}

void loop( )
{
  sensorValue = analogRead(sensorPin);
  Serial.println("Analog Value : ");
  Serial.println(sensorValue);
  if (sensorValue<limit)
  {
    digitalWrite(13, HIGH);
  }
  else{
    digitalWrite(13, LOW);
  }
  delay(1000);
}
Usage
- Agricultural science and horticulture
- Irrigation planning
- Climate research
- Solute transport studies
- Auxiliary sensors for soil respiration