Python Tutorials – பாடம் 6 – Position Encoder sensor using Raspberry Pi Pico
Raspberry Pi Pico வை பயன்படுத்தி ஒரு position encoder ஐ அளவீடு செய்வது
Required Components
Position encoder sensor-1 no
Raspberry Pi Pico-1 no
Connecting Wires-1set
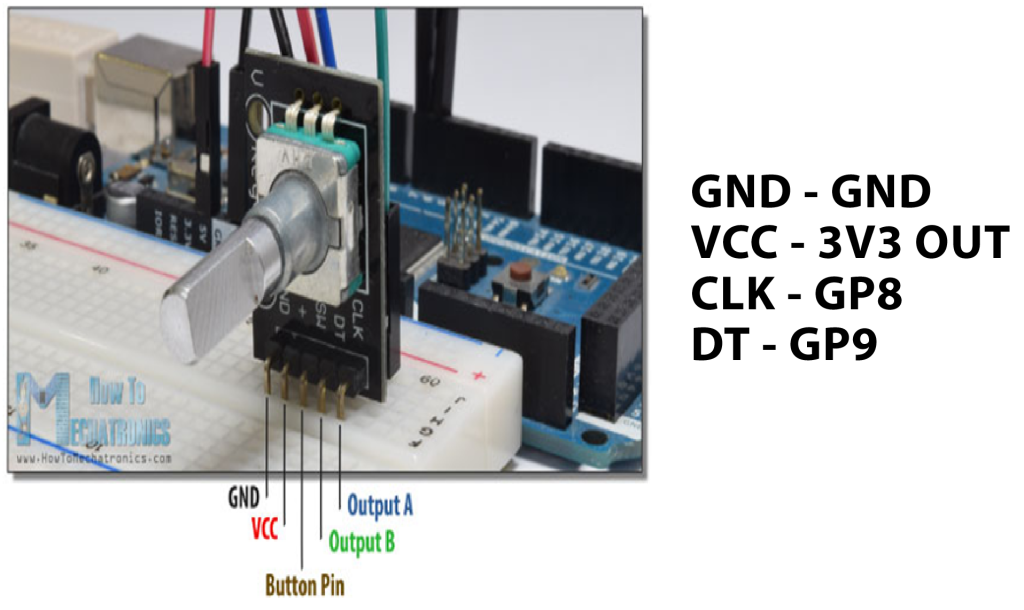
Circuit
Steps
நாம் பயன்படுத்தும் உபகரணங்கள் சரியாக வேலை செய்கிறதா என்பதை உறுதி செய்து கொள்ளவும்.
Position encoder sensorல் உள்ள CLK மற்றும் DT பின்களை Raspberry Pi Pico வில் உள்ள GP8 மற்றும் GP9 பின்களுடன் இணைக்க வேண்டும்.
Position encoder ன் +5V மற்றும் ground சப்ளையை Raspberry Pi Pico 3V3 (OUT) மற்றும் gnd உடன் இணைக்க வேண்டும்.
Python program ஐ சரி பார்க்க வேண்டும்.
மின்சுற்றை சரி பார்க்க வேண்டும்.
Python program ஐ ரன் செய்ய வேண்டும்.
Python Program
from machine import Pin
import utime

DT_Pin = Pin(9, Pin.IN, Pin.PULL_UP)
CLK_Pin = Pin(8, Pin.IN, Pin.PULL_UP)
SW = Pin(2, Pin.IN, Pin.PULL_UP)

LEDs = [25,4]

#create an empty list to assing pins in pico
led_pins = []

for x in range(0,2):
    led_pins.append(Pin(LEDs[x], Pin.OUT))

value = 0
previousValue = 1

def rotary_changed():

    global previousValue
    global value

    if previousValue != CLK_Pin.value():
        if CLK_Pin.value() == 0:
            if DT_Pin.value() == 0:

                value = (value - 1)%2
                print("anti-clockwise", value)
            else:

                value = (value + 1)%2
                print("clockwise", value)
        previousValue = CLK_Pin.value()

    if SW.value() == 0:
        print("Button pressed")
        utime.sleep(1)

while True:
    for i in range(0,2):
        led_pins[i].value(0)
        rotary_changed()
        led_pins[value].value(1)
        utime.sleep(0.001)