L298N Motor Driver ஐ பயன்படுத்தி 1 DC மோட்டாரை கட்டுப்படுத்துவது
Required Components
- L298N Motor Driver Module-1 no
- Raspberry Pi Pico-1 no
- DC Motor(gear)-2 no
- 12V Battery-1 no
- Data Cable-1 no
- Connecting Wires-4 no
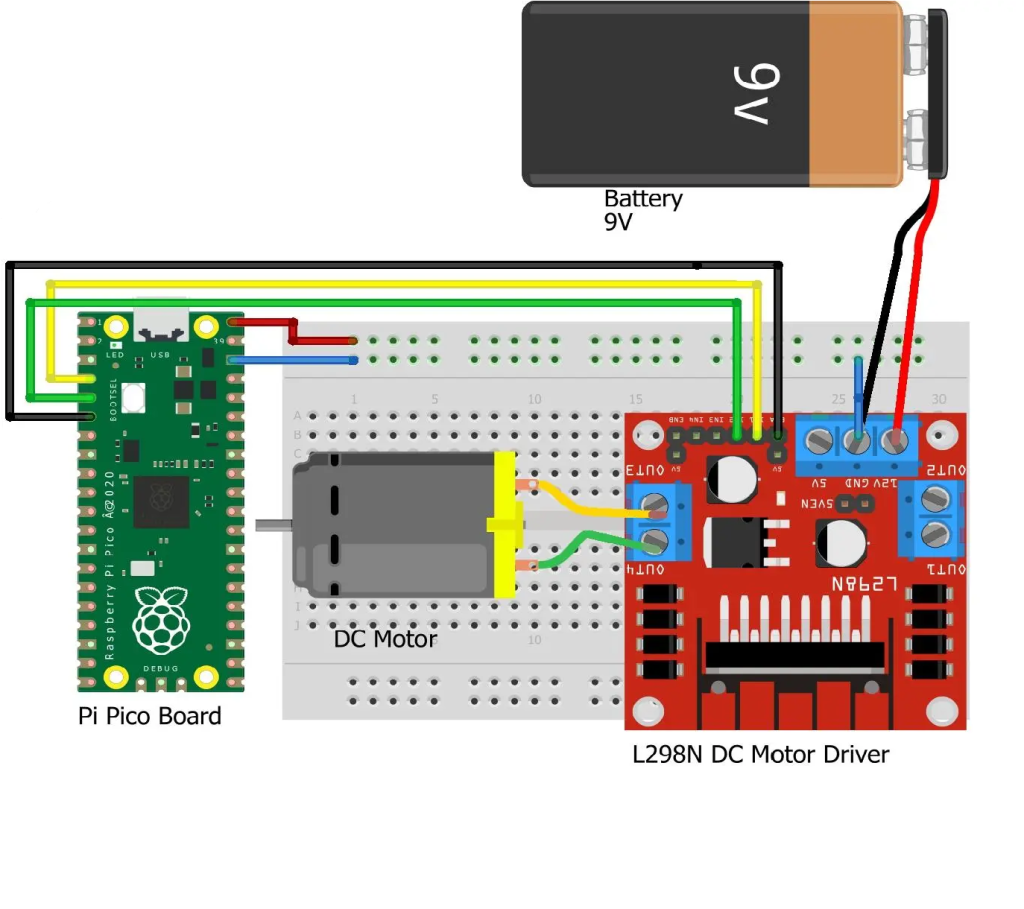
Circuit
Steps
- நாம் பயன்படுத்தும் உபகரணங்கள் சரியாக வேலை செய்கிறதா என்பதை உறுதி செய்து கொள்ளவும்.
- மோட்டார் Driver போர்டு உடன் +12V battery இணைக்க வேண்டும்.
- +12V பேட்டரி இணைப்புகளை சரியாகவும் கவனமாகவும் இணைக்க வேண்டும்.
- மோட்டார் Driver போர்டு ENA, IN1, IN2 பின்களை Raspberry Pi Pico பின்களான GP4, GP2, GP3 உடன் இணைக்க வேண்டும்.
- மோட்டார் Driver போர்டு OUTPUT பின்களை DC மோட்டார் பின்களுடன் இணைக்க வேண்டும்.
- மோட்டார் Driver போர்டு GND ஐ Raspberry Pi Pico GND உடன் இணைக்க வேண்டும்.
- Arduino program ஐ சரி பார்க்க வேண்டும்.
- மின்சுற்றை சரி பார்க்க வேண்டும்.
- Arduino program ஐ ரன் செய்ய வேண்டும்.
Arduino Program
int motor1pin1 = 2;
int motor1pin2 = 3;
int enPin1 = 4;

void setup()
{
  pinMode(motor1pin1, OUTPUT);
  pinMode(motor1pin2, OUTPUT);
  pinMode(enPin1, OUTPUT);
  digitalWrite(enPin1, HIGH);
}

void loop()
{
  digitalWrite(motor1pin1, HIGH);
  digitalWrite(motor1pin2, LOW);
  delay(1000);

  digitalWrite(motor1pin1, LOW);
  digitalWrite(motor1pin2, HIGH);
  delay(1000);
}
