Creating accelerometer sensor program using Arduino UNO
Required Components
- Accelerometer sensor (MPU 6050) -1 no
- Arduino UNO board -1 no
- Jumper cable -4 no
- Servo motor -1 no
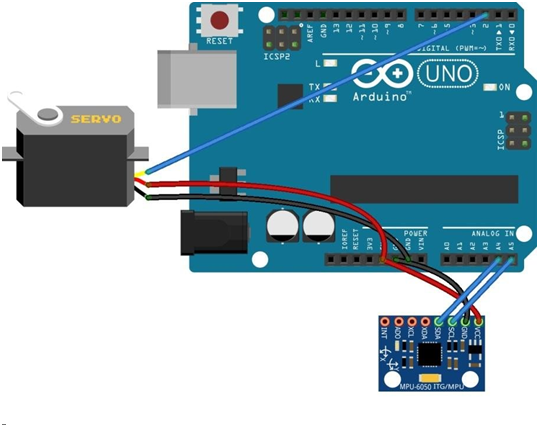
Circuit
Steps
- Make sure the components are working properly.
- Connect the Arduino UNO pin SDA & SCL to accelerometer sensor SDA & SCL pin.
- Connect the servo motor data pin to the Arduino UNO pin 2.
- Connect the +5v and ground connections respectively.
- Check the Arduino program.
- Check the Circuit Connections.
- Run the Arduino program.
Arduino Program
#include <Wire.h>
#include <MPU6050.h>
#include <Servo.h>
Servo sg90;
int servo_pin = 2;
MPU6050 sensor ;
int16_t ax, ay, az ;
int16_t gx, gy, gz ;

void setup ()
{
  sg90.attach ( servo_pin );
  Wire.begin ( );
  Serial.begin  (9600);
  Serial.println  ( "Initializing the sensor" );

  sensor.initialize ( );
  Serial.println (sensor.testConnection ( ) ? "Successfully Connected" : "Connection failed");
  delay (1000);
  Serial.println ( "Taking Values from the sensor" );
  delay (1000);
}

void loop ()
{
  sensor.getMotion6 (&ax, &ay, &az, &gx, &gy, &gz);
  ax = map (ax, -17000, 17000, 0, 180) ;
  Serial.println (ax);
  sg90.write (ax);
  delay (200);
}
Usage
- Mobile phones
- Drone camera stabilization
- To detect faults in rotator machine
- To display images in an upright position on screens of digital cameras