Creating single LED blink program using Arduino UNO
Required Components
- Led – 1 no
- Resister 220Ω – 1 no
- Arduino UNO board – 1 no
- Connecting wires – 1 no
Circuit
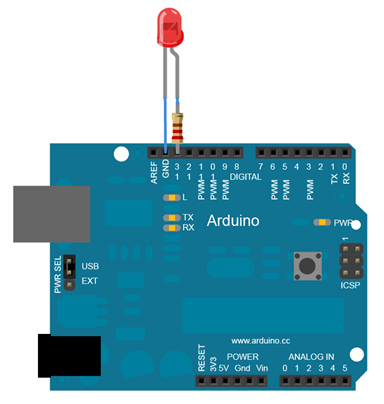
Steps
- Make sure the components are working properly.
- Connect 220 Ω Resistor to the LED Anode (+) pin and cathode (-) pin to Gnd.
- Connect Arduino pin13 to the 220 Ω Resistor .
- Check the Arduino program.
- Check the circuit connections.
- Run the Arduino program.
Arduino Program
int led1 = 13;

void setup ( )
{
  pinMode (led1, OUTPUT);
}

void loop ( )
{
  digitalWrite (led1, HIGH);
  delay (3000);
  digitalWrite (led1, LOW);
  delay (1000);
}
Usage
- TV backlighting.
- Smartphone lights.
- Automotive lights.
- LED Display.
