Python Tutorials – Lesson 2 – Double led blink using Raspberry Pi Pico

To check double LED blink using Raspberry Pi Pico

Required Components

  1. Led _ 2 no
  2. Raspberry Pi Pico board _ 1 no
  3. Connecting wires _ 1 set

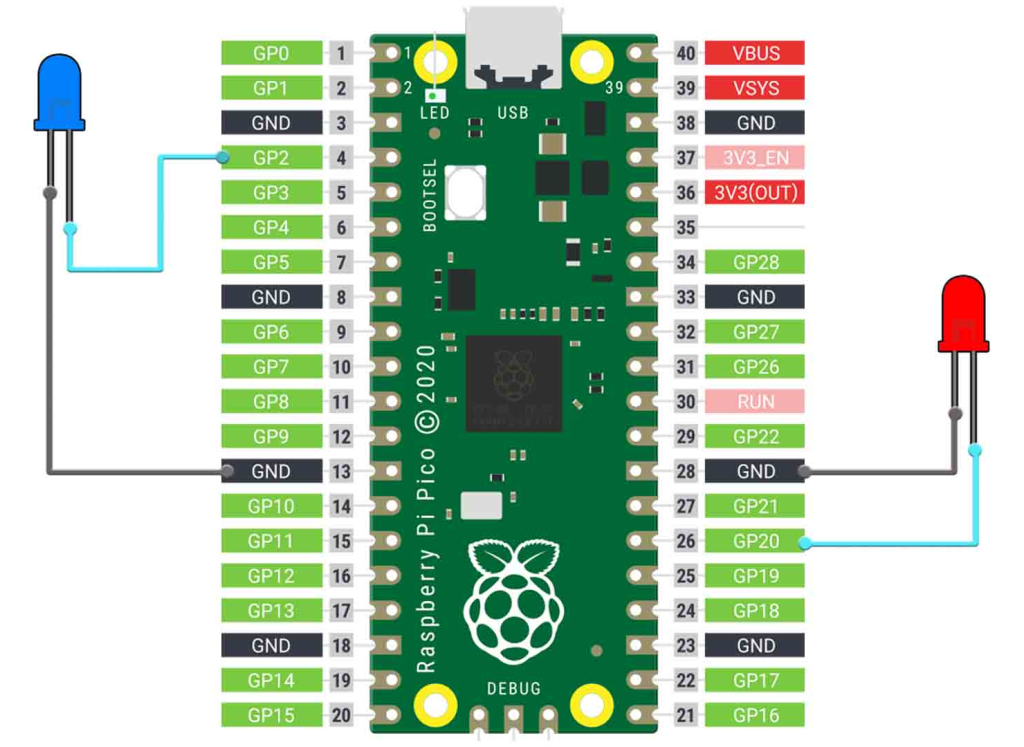
Circuit

Steps

  1. Make sure the components are working properly.
  2. Connect Led GND pins to Raspberry Pi Pico GND pins respectively.
  3. Connect Raspberry Pi Pico GP2, GP20 pins to the each LED anode pin.
  4. Check the Python program.
  5. Check the circuit connections.
  6. Run the Python program.

Python Program

from machine import Pin
import utime  #timer

led1=Pin(2,Pin.OUT)
led2=Pin(17,Pin.OUT)

while(True):    
    led1.value(1)
    led2.value(1)
    utime.sleep(2) #delay of 1 sec
    led1.value(0)
    led2.value(0)
    utime.sleep(2)

Python Tutorials – Lesson 1 – Single LED Blink Using Raspberry Pi Pico

To check single LED blink using Raspberry Pi Pico

Required Components

  1. Led _1 no
  2. Resister 330Ω _1 no
  3. Raspberry Pi Pico board _1 no
  4. Connecting wires _1 set

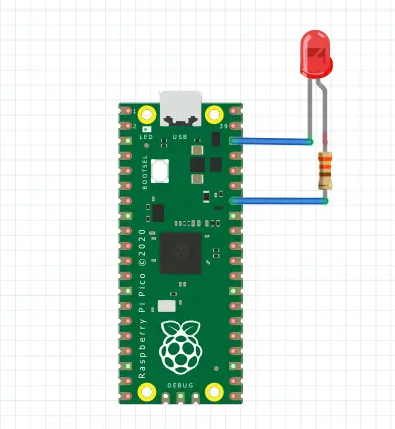
Circuit

Steps

  1. Make sure the components are working properly.
  2. Connect 330 Ω Resistor to the LED Anode (+) pin and LED cathode (-) pin to Gnd.
  3. Connect Raspberry Pi Pico pin 28 to the LED anode pin.
  4. Check the Python program.
  5. Check the circuit connections.
  6. Run the Python program.

Python Program

from machine import Pin
import utime  #timer

led1=Pin(2,Pin.OUT)

while(True):    
    led1.value(1)
    utime.sleep(2) #delay of 1 sec
    led1.value(0)
    utime.sleep(2)

Arduino Tutorials – Lesson 37 – Double led blink using Raspberry Pi Pico

To check double LED blink using Raspberry Pi Pico

Required Components

  1. Led _ 2 no
  2. Raspberry Pi Pico board _ 1 no
  3. Connecting wires _ 1 set

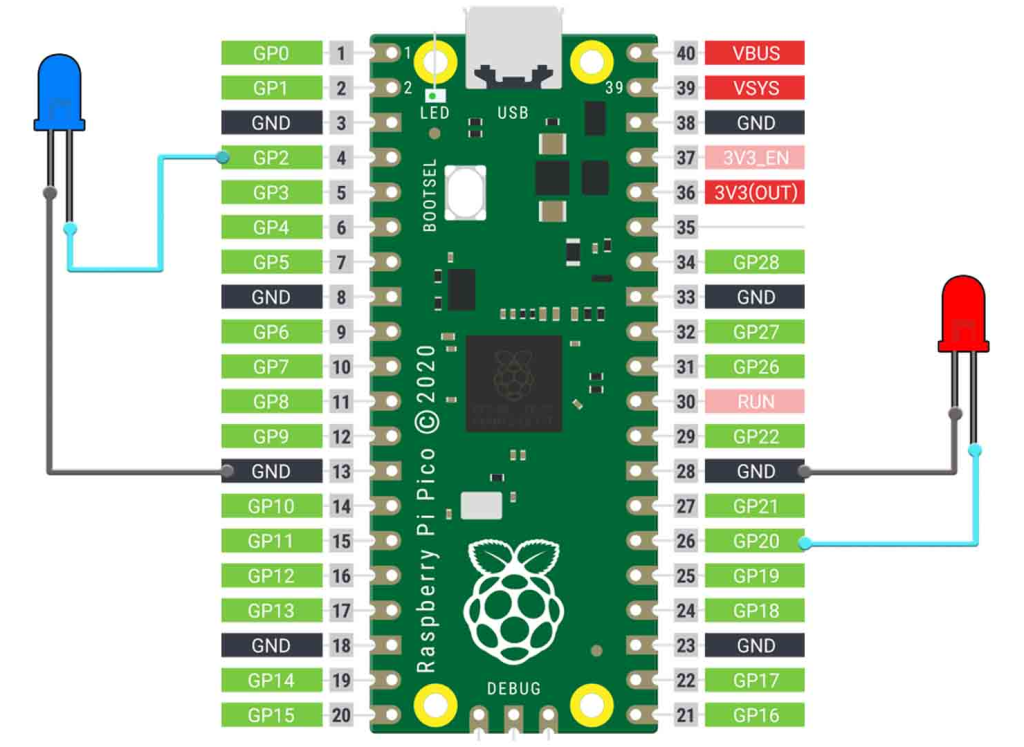
Circuit

Steps

  1. Make sure the components are working properly.
  2. Connect Led GND pins to Raspberry Pi Pico GND pins respectively.
  3. Connect Raspberry Pi Pico GP2, GP20 pins to the each LED anode pins.
  4. Check the Arduino program.
  5. Check the circuit connections.
  6. Run the Arduino program.

Arduino Program

int Led1 = 2;
int Led2 = 20;

void setup() 
{
  pinMode(Led1, OUTPUT);
  pinMode(Led2, OUTPUT);

}

void loop() 
{
  digitalWrite(Led1, HIGH);
  digitalWrite(Led2, HIGH);
  delay(1000);

  digitalWrite(Led1, LOW);
  digitalWrite(Led2, LOW);
  delay(1000);
}
Arduino Tutorials – Lesson 36 – Single LED Blink Using Raspberry Pi Pico

To check single LED blink using Raspberry Pi Pico.

Required Components

  1. Led _1 no
  2. Resister 330Ω _1 no
  3. Raspberry Pi Pico board _1 no
  4. Connecting wires _1 set

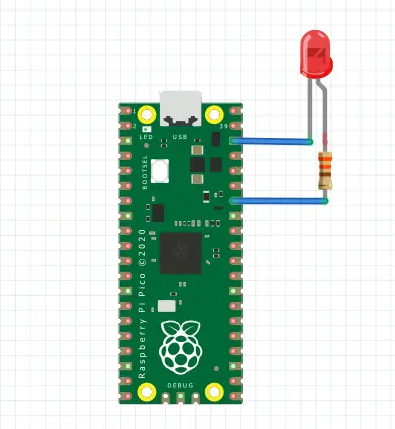
Circuit

Steps

  1. Make sure the components are working properly.
  2. Connect 330 Ω Resistor to the LED Anode (+) pin and LED cathode (-) pin to Gnd.
  3. Connect Raspberry Pi Pico pin 28 to the LED anode pin.
  4. Check the Arduino program.
  5. Check the circuit connections.
  6. Run the Arduino program.

Arduino Program

int led1 = 28;

void setup ( )
{
  pinMode (led1, OUTPUT);
}

void loop ( )
{
  digitalWrite (led1, HIGH);
  delay (3000);
  digitalWrite (led1, LOW);
  delay (1000);
}