To check double LED blink using Raspberry Pi Pico
Required Components
- Led _ 2 no
- Raspberry Pi Pico board _ 1 no
- Connecting wires _ 1 set
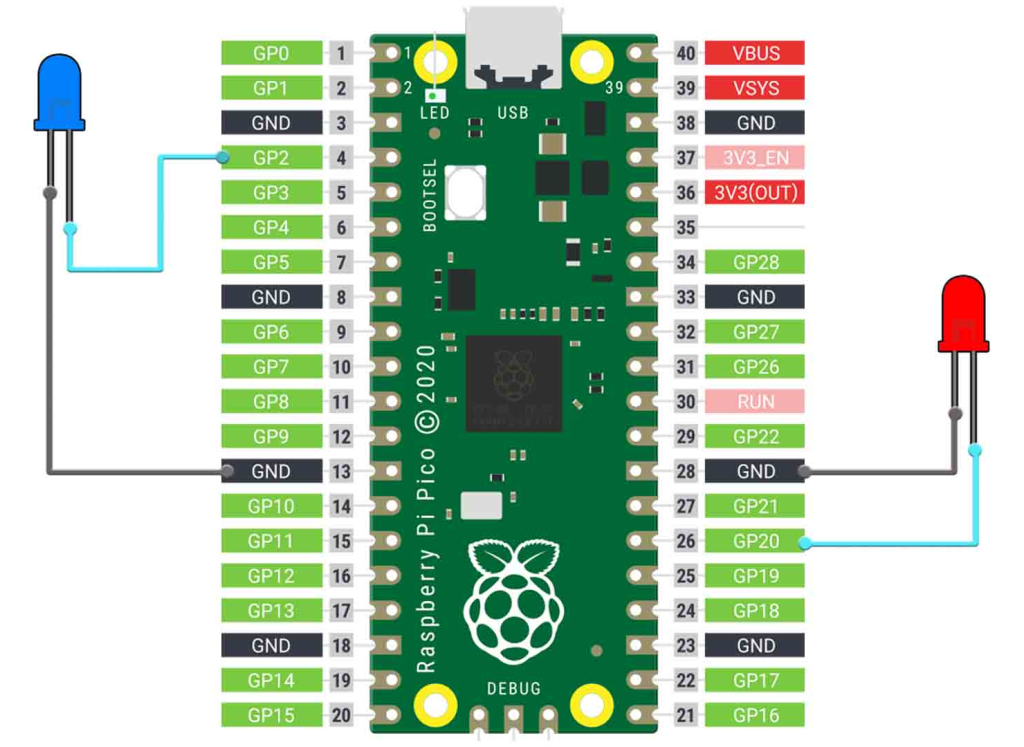
Circuit
Steps
- Make sure the components are working properly.
- Connect Led GND pins to Raspberry Pi Pico GND pins respectively.
- Connect Raspberry Pi Pico GP2, GP20 pins to the each LED anode pins.
- Check the Arduino program.
- Check the circuit connections.
- Run the Arduino program.
Arduino Program
int Led1 = 2;
int Led2 = 20;

void setup()
{
  pinMode(Led1, OUTPUT);
  pinMode(Led2, OUTPUT);

}

void loop()
{
  digitalWrite(Led1, HIGH);
  digitalWrite(Led2, HIGH);
  delay(1000);

  digitalWrite(Led1, LOW);
  digitalWrite(Led2, LOW);
  delay(1000);
}